Every gardening season brings the excitement of new growth, fresh seeds, and colorful blooms. Yet, filling every container and raised planter with brand new potting soil quickly becomes an expensive habit. Most bagged potting soils contain peat moss, coco coir, pine bark, and perlite, all of which break down, compact, and lose their nutrient value over time.
Throwing out used potting mix every single year is both wasteful and unnecessary. With a little effort, basic amendments, and proper soil hygiene, you can easily revitalize your old potting soil. In this comprehensive guide, I will walk you through the entire process of refreshing spent container soil so your plants can thrive without draining your wallet.
Why You Should Rejuvenate Potting Soil
Discarding used potting soil after one growing season wastes money and natural resources. Commercial potting mixes rely heavily on mined peat or processed coco coir, which take energy to package and transport.
Rejuvenating your existing soil keeps high quality structure out of the landfill while reducing your garden supply expenses by more than half.
While old soil loses its initial dose of fertilizer, the base structural ingredients are usually still intact. By sifting out root debris, washing away accumulated mineral salts, and replenishing the biological life, you restore the potting mix to peak condition.
Understand What Grew in the Soil
Before you begin refreshing your soil, it helps to review what plants lived in that container previously. Different plant families extract wildly different ratios of nitrogen, phosphorus, potassium, and trace minerals.
Understanding what was grown gives you a clear roadmap for what nutrients are missing and how you should plan your next round of planting.
Heavy Feeders and Nutrient Drain
Plants like tomatoes, squash, cabbage, peppers, and eggplants demand enormous amounts of nutrition throughout their life cycles.
If you grew heavy feeders in your pots last summer, the soil is almost certainly stripped of available nitrogen and potassium. The organic matter will also be depleted because micro organisms worked overtime to break down nutrients for the roots.
Soil used for heavy feeders requires a generous boost of organic compost and balanced organic fertilizer before you plant in it again.
Moderate Feeders and Balanced Growth
Moderate feeders include root vegetables like beets, carrots, radishes, as well as leafy greens like Swiss chard and lettuce.
These crops absorb a steady, balanced amount of nutrition without stripping the soil down to nothing. Soil taken from these planters usually retains decent structure and simply requires basic aerating and a light feeding.
Light Feeders and Soil Resting
Light feeders include culinary herbs such as rosemary, thyme, and oregano, as well as nitrogen fixing legumes like bush beans and peas.
Legumes actually partner with beneficial bacteria to take nitrogen from the air and deposit it into the root zone. If your old soil held peas or beans, it may already have a modest boost of residual nitrogen available for the next crop.
Using Crop Rotation in Containers
Crop rotation is a fundamental farming strategy that works wonders in container gardening as well. You should avoid planting the same botanical family in the same soil two seasons in a row.
For example, if you grew tomatoes or peppers in a pot last year, rotate to root vegetables or leafy greens the following season. Following up with herbs or legumes the third year completes a gentle cycle that prevents specific nutrient voids and breaks pest lifecycles.
Check for Pests and Disease History
Not all old soil can or should be salvaged. You must conduct an honest health assessment of the past growing season before mixing old soil into fresh batches.
Fungal spores, bacterial wilts, root knot nematodes, and persistent insect eggs can overwinter in container media. Reusing contaminated potting soil will immediately infect your new seedlings.
Signs Your Soil Should Be Thrown Away
If your previous plants suffered from catastrophic issues like late blight, fusarium wilt, or severe root rot, it is best to discard the soil entirely or bury it in an ornamental flower bed far from your vegetable garden.- Visible root rot that left behind black, mushy, foul smelling roots.
- Confirmed fungal blights or persistent bacterial spot diseases.
- Severe infestations of fungus gnat larvae or root aphids that never cleared up.
- Soil that has turned sour or anaerobic due to standing water and zero drainage.
Evaluate the Soil Volume and Compaction
Take a look at the level of soil remaining in your containers. Over a season of watering, organic material decomposes into tiny particles, causing the soil level to drop significantly below the rim of the pot.
This compaction squeezes out oxygen pockets that roots desperately need for respiration. Rejuvenation involves opening up those compacted spaces by adding fresh aeration materials like perlite or pumice alongside fresh bulk organic matter.
Test and Balance the Soil pH
Most potting mixes naturally become more acidic as peat moss decomposes and regular tap water or fertilizer salts interact with the media. Most garden vegetables and houseplants prefer a slightly acidic to neutral pH between 6.2 and 6.8.
Use a simple soil pH test kit or digital probe to determine your soil acidity.
If your soil pH has plummeted below 6.0, mixing in a small amount of garden lime or dolomitic limestone will raise the pH and supply essential calcium and magnesium. If the soil is somehow too alkaline, adding elemental sulfur or peat moss will gently bring it back into balance.
Essential Tools and Materials You Need
Gathering your supplies beforehand makes the soil rejuvenating process quick, clean, and organized. Here is what you will need for a standard batch:- A heavy duty plastic tarp or large plastic mixing tub.
- A garden sieve, hardware mesh screen, or hand fork.
- A garden hose with a spray nozzle.
- Fresh potting mix or coco coir (to create a 50/50 blend).
- Quality organic compost or worm castings.
- Perlite, coarse pumice, or rice hulls for aeration.
- Slow release balanced organic fertilizer granular blend.
- Garden lime or sulfur (only if pH testing shows it is needed).
Lay Out Your Soil on a Tarp
Start by emptying your targeted pots onto a large tarp spread out across a patio, driveway, or lawn. Dumping the containers out completely lets you inspect the full root ball and see the bottom layer where salts and silt gather.
Use a garden hand fork or your fingers to break apart dense root masses and clumps of hardened soil. Spread the soil out in a relatively thin layer so it can breathe and catch sunlight.
Sift Out Roots and Old Debris
Old roots and woody stems take a long time to break down in a pot and can create pockets of decay if left behind. Sifting the soil separates these unwanted debris chunks easily.
Pass the broken up soil through a garden sieve or a homemade screen built with quarter inch hardware cloth. Discard thick roots, dried foliage, stones, and dead weed remnants.
Small, fine hair roots can remain, as they will quickly break down into organic matter once active microbes are reintroduced.
Flush Built Up Salts with Water
Synthetic fertilizers and mineral heavy tap water leave behind concentrated chemical salts in container soil. Over time, these salt crusts burn delicate feeder roots and prevent plants from absorbing moisture properly.
Place your sifted soil into nursery pots or buckets with generous drainage holes at the bottom. Slowly drench the soil with fresh water until it runs freely out of the drainage holes for several minutes.
Allow the containers to drain thoroughly, then spread the damp soil back out onto your tarp under full sun to dry out slightly before the next step.
Solarize the Soil if Needed
If you suspect minor pest presence like fungus gnat eggs or mild mildew spores, solarization provides a natural sanitizing boost. It uses passive heat from the sun to pasteurize the soil without killing all beneficial elements.
Moisten the soil lightly, gather it into a shallow pile on your tarp, and cover it tightly with clear plastic sheeting. Weigh down the edges with stones or bricks.
Leaving this plastic cover in direct sunlight for several warm days creates high temperatures that eliminate insect eggs, weed seeds, and weak pathogens.
Blend in Fresh Potting Mix
Never rely entirely on old soil without adding fresh bulk material. Over time, the fibrous quality of peat and coir breaks down into fine dust that compacts easily.
A proven rule of thumb is to make a 50/50 mix consisting of half rejuvenated old soil and half brand new, unfertilized potting mix or rehydrated coco coir.
This blend instantly restores pore space, drainage capacity, and water retention without forcing you to buy dozens of new bags.
Add Organic Matter and Compost
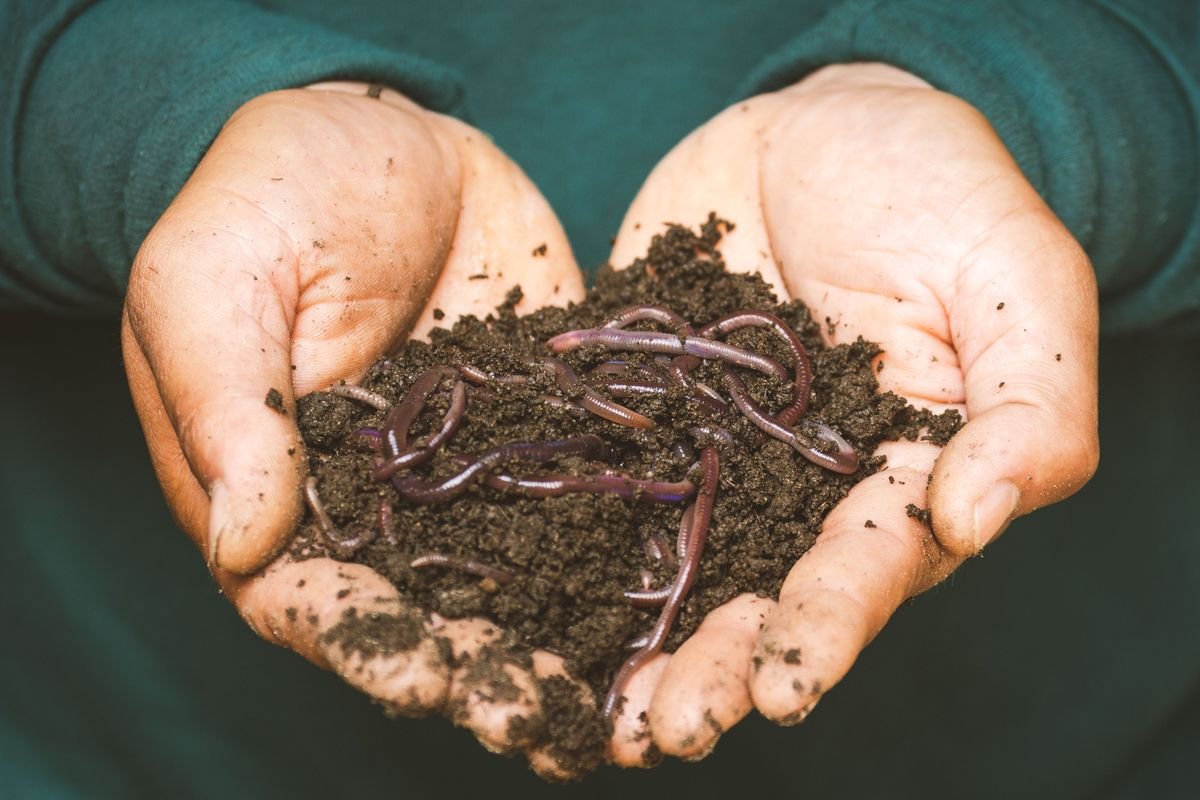
Sterile potting soil lacks the rich biological ecosystem found in natural ground soil. Adding high quality compost or worm castings injects millions of beneficial fungi and bacteria into your mix.
Incorporate finished compost at a ratio of roughly ten to twenty percent of the total volume.
Worm castings are exceptionally gentle, nutrient rich, and full of beneficial microbes that help plants resist soil borne diseases naturally.
Incorporate Slow Release Nutrients
Because used soil has spent its original fertility, you must add balanced nutrients back into the root zone. Slow release organic granular fertilizers are ideal because they feed the soil biology steadily over several months.
Look for an all purpose organic fertilizer with a balanced ratio such as 4-4-4 or 5-5-5 that contains bone meal, kelp meal, alfalfa meal, and feather meal.
Follow the package dosing instructions carefully, which generally equates to one or two tablespoons of fertilizer per gallon of soil mix.
Mix Thoroughly and Check Moisture
With all amendments added to your tarp, it is time to blend everything into a uniform, fluffy potting medium. Use a garden rake, shovel, or your gloved hands to turn the pile repeatedly.
Check the moisture consistency by grabbing a handful of the finished mix and squeezing it. It should hold its shape like a damp sponge without dripping water or crumbling instantly.
If the soil feels dusty and dry, mist it with a garden hose while turning the pile until evenly hydrated.
Let the Recharged Soil Cure
Patience is key to successful soil revitalization. Once your soil is mixed, avoid planting in it immediately.
Allowing the soil mixture to cure for two to three weeks gives beneficial bacteria and mycorrhizal fungi time to populate the amendments. It also lets slow release organic fertilizers begin their mild breakdown process so they do not burn delicate young roots.
Cover the pile loosely with a breathable tarp or transfer it into storage tubs with air holes during this resting phase.
Best Ways to Store Rejuvenated Soil
If you are preparing your soil in the autumn or early spring before planting begins, proper storage protects your hard work from weather and contamination.
Store the refreshed soil in large plastic storage totes, clean five gallon buckets with lids, or breathable fabric bags. Keep the containers in a shaded, cool area like a garage, tool shed, or under a porch.
Never seal moist soil in completely airtight containers without small ventilation holes, as lack of oxygen encourages harmful anaerobic bacteria.
Long Term Soil Maintenance Tips
Rejuvenating soil is an ongoing cycle that keeps your garden thriving year after year. Most potting soil can be successfully revitalized for three to four consecutive seasons using this method.
Eventually, after multiple seasons of intense decomposition, the mineral grains become too fine and will need to be retired to your outdoor garden beds or compost heap.
By staggering your soil batches and rotating crops each season, you maintain a self sustaining potting system that saves money and produces abundant, healthy harvests.
Can Your Old Potting Soil Be Rejuvenated?
Answer 4 quick questions to see your result