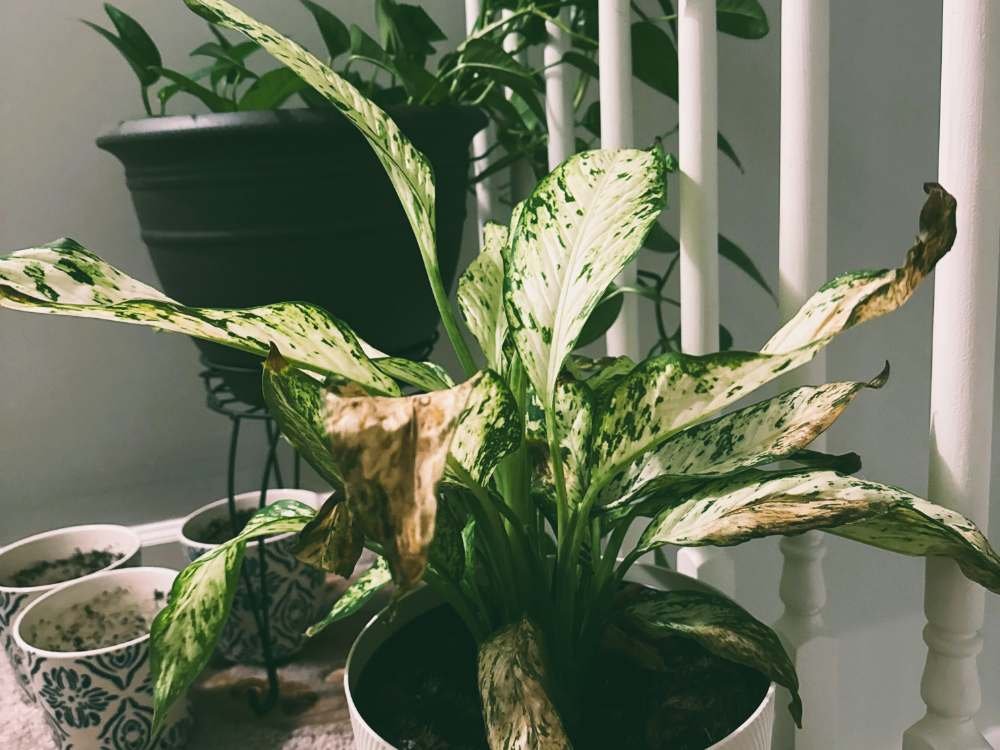
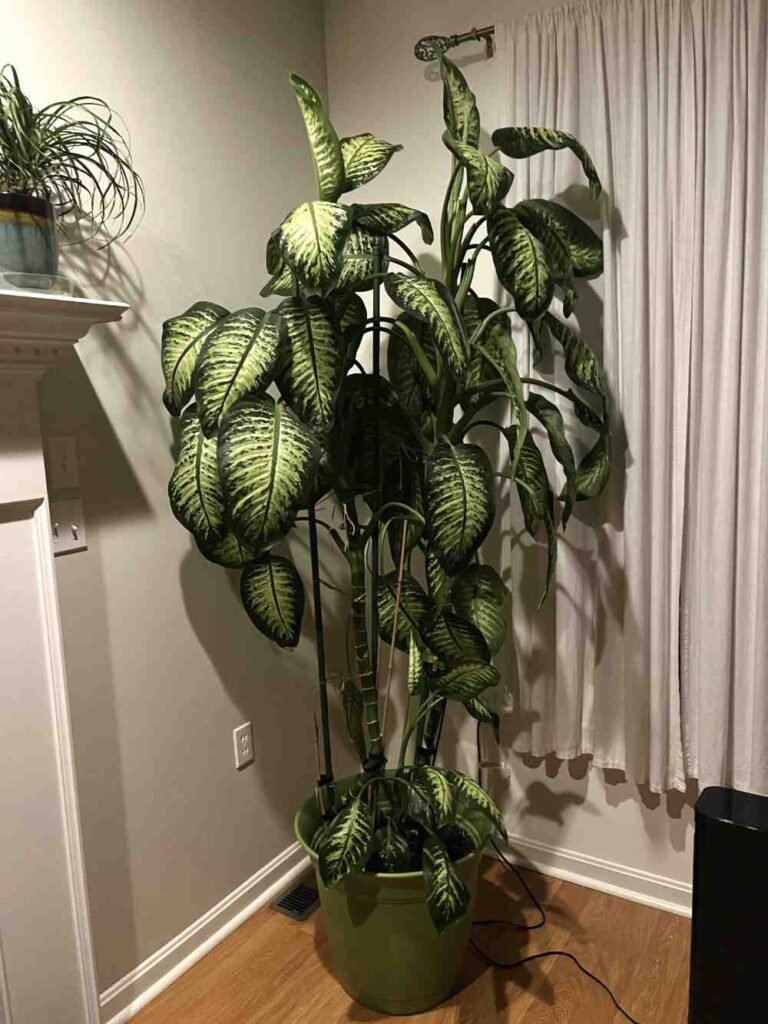
Dieffenbachia plants, commonly known as dumb cane or leopard lily, rank among the most popular tropical houseplants across the globe.
Their bold, patterned foliage and forgiving light requirements make them a fixture in living rooms, offices, and indoor gardens everywhere.
Beneath those lush variegated leaves lies a delicate root network that is highly vulnerable to moisture stress. When indoor conditions turn overly wet, root rot can develop silently beneath the soil line.
If left untreated, this fungal condition will destroy your plant from the base upward. Catching the warning signs early gives your dieffenbachia the best possible chance to make a full recovery.
What Is a Dieffenbachia Plant
Dieffenbachia is a genus of tropical flowering perennials native to the warm regions of Central and South America. In their natural habitat, they flourish along the floor of tropical rainforests under a canopy of filtered sunlight.
These plants belong to the Araceae family, which makes them close relatives of philodendrons, monsteras, and peace lilies.
When grown indoors, they can reach heights between three and six feet, with some mature specimens growing even larger over time. Their broad leaves display distinct patterns of cream, white, yellow, and deep green variegation.
Dieffenbachia plants produce a unique inflorescence consisting of a green, leaf-like spathe wrapped around a pale spike called a spadix. While indoor blooms are relatively rare, the foliage alone provides plenty of visual appeal.
Common Varieties You Might Grow
Growers cultivate dozens of dieffenbachia cultivars, each offering a distinct leaf pattern and growth habit.
- Dieffenbachia Camille: Features creamy white centers bordered by rich, emerald green margins.
- Dieffenbachia Tropic Snow: Known for wide, dark green leaves flecked with white and silver along the central veins.
- Dieffenbachia Compacta: A smaller, bushy variety that works well on desks and compact shelves.
- Dieffenbachia Reflector: Boasts striking lime green and yellow mottled spots across velvety dark foliage.
Regardless of the specific cultivar you choose to keep, all varieties share similar moisture sensitivities and require identical care strategies to avoid root problems.
Toxicity and Safe Handling Practices
Every part of the dieffenbachia plant contains needle-shaped calcium oxalate crystals known as raphides.
If the plant tissue is chewed or crushed, these microscopic crystals shoot into soft tissues, causing intense irritation, burning, and localized swelling. Ingesting the sap can temporarily paralyze the vocal cords, which is how the plant earned its historical nickname of dumb cane.
Whenever you prune, repot, or examine your plant, you must protect your skin from direct contact with the sap.
Wear sturdy rubber gardening gloves or double-layered nitrile gloves during any maintenance routine. If sap splashes onto your skin, wash the area immediately with warm water and a mild soap. Keep all pruned plant material far out of reach from curious pets and small children.
Understanding the Basics of Overwatering
Overwatering remains the single most common cause of houseplant mortality, and dieffenbachias are particularly susceptible.
Many plant owners assume that overwatering simply means providing too much water at one time. In reality, overwatering refers to how frequently moisture is applied and how long the substrate stays soaked.
In an indoor setting, moisture evaporates much slower than it does outdoors. Indoor spaces lack natural wind currents, direct sunlight, and wide root distribution networks.
When you add fresh water before the previous moisture has drained away and dried out, you create an environment where roots remain constantly saturated.
Why Houseplant Roots Suffocate
Plant roots require access to oxygen just as much as they require water and dissolved minerals.
In healthy, well-structured potting soil, tiny air pockets exist between particles of peat, perlite, and bark. As water runs through the soil, it pulls fresh air down into these open pockets, allowing the root cells to breathe through cellular respiration.
When soil remains flooded, water displaces all the air pockets in the container.
Deprived of oxygen, root cells begin to starve and suffocate. The roots lose their ability to absorb moisture and nutrients, which triggers a rapid decline across the entire plant.
How Saturated Soil Damages Cellular Health
As root cells suffocate, their structural walls break down, releasing cellular juices into the surrounding substrate.
This breakdown creates an open pathway for opportunistic soil microbes to attack the weakened plant tissue. At the same time, the leaves above ground may show signs of edema, which occurs when roots absorb moisture faster than leaves can transpire it.
Edema causes tiny cells inside the foliage to rupture under hydrostatic pressure, producing small blisters or yellow specks on the leaf surfaces.
Left uncorrected, cellular collapse in the root system spreads upward toward the main crown and stems.
The Importance of Soil Drainage
Providing proper drainage is the most effective safeguard against root problems in tropical houseplants.
Dieffenbachias thrive when their roots stay evenly moist yet aerated. They cannot tolerate standing in boggy, waterlogged conditions for extended periods.
Drainage operates on two distinct levels: the physical pot design and the porosity of the growing medium.
If either of these elements fails, excess moisture collects at the bottom of the container, creating an oxygen-free zone where decay spreads quickly.
Ideal Soil Components for Dumb Cane
Standard off-the-shelf potting soil is often too dense and moisture-retentive for indoor dieffenbachias.
Creating a custom, well-draining potting blend allows excess moisture to run freely while holding onto the right amount of humidity for root uptake.
Consider mixing the following components to create a balanced potting medium:
- Peat Moss or Coco Coir (40%): Provides a lightweight base that retains moderate moisture without compacting quickly.
- Coarse Perlite or Pumice (30%): Creates critical air channels and prevents soil particles from clumping together.
- Orchid Bark (20%): Adds chunky structure and mimics the forest floor environment where dieffenbachias grow naturally.
- Worm Castings (10%): Delivers gentle, slow-release biological nutrients to support root vitality.
This blend ensures that water drains out within seconds while the remaining soil particles retain enough moisture to support steady hydration.
Selecting the Right Pot and Drainage Holes
The container you choose plays a significant role in managing soil moisture levels.
Always select pots that feature one or more functional drainage holes at the base. Decorative cachepots without drainage should only be used as outer decorative sleeves, with the plant resting in an inner plastic nursery pot.
Unfinished terracotta pots are an exceptional choice for growers who tend to overwater.
Terracotta is porous, allowing moisture to evaporate through the pot walls as well as the surface of the soil. Plastic and glazed ceramic pots retain moisture for much longer periods, meaning you will need to extend the interval between waterings.
What Exactly Is Root Rot
Root rot is a destructive condition caused by prolonged waterlogging combined with aggressive fungal or water-mold organisms.
As the roots decay, they turn into a soft, mushy mass that can no longer transport water or nutrients upward into the stems and leaves.
Because the damage occurs hidden beneath the soil surface, the problem often progresses unnoticed for weeks.
By the time top foliage exhibits visible distress, a substantial portion of the root system may already be compromised.
Pathogens Behind the Decay
While oxygen starvation initiates the decline, microscopic pathogens accelerate tissue destruction.
Common water-mold species such as Pythium and Phytophthora, along with fungal organisms like Fusarium and Rhizoctonia, thrive in water-saturated environments.
These pathogens produce mobile spores that swim through wet soil, infecting damaged root tips.
Once inside the root cortex, the fungi feed on decaying organic tissue, multiplying rapidly and spreading toward the main crown.
Early Warning Signs in Foliage
Recognizing the earliest symptoms of distress above the soil line is critical for saving your plant before root loss becomes irreversible.
Keep a close eye on changes in leaf texture, color, and posture.
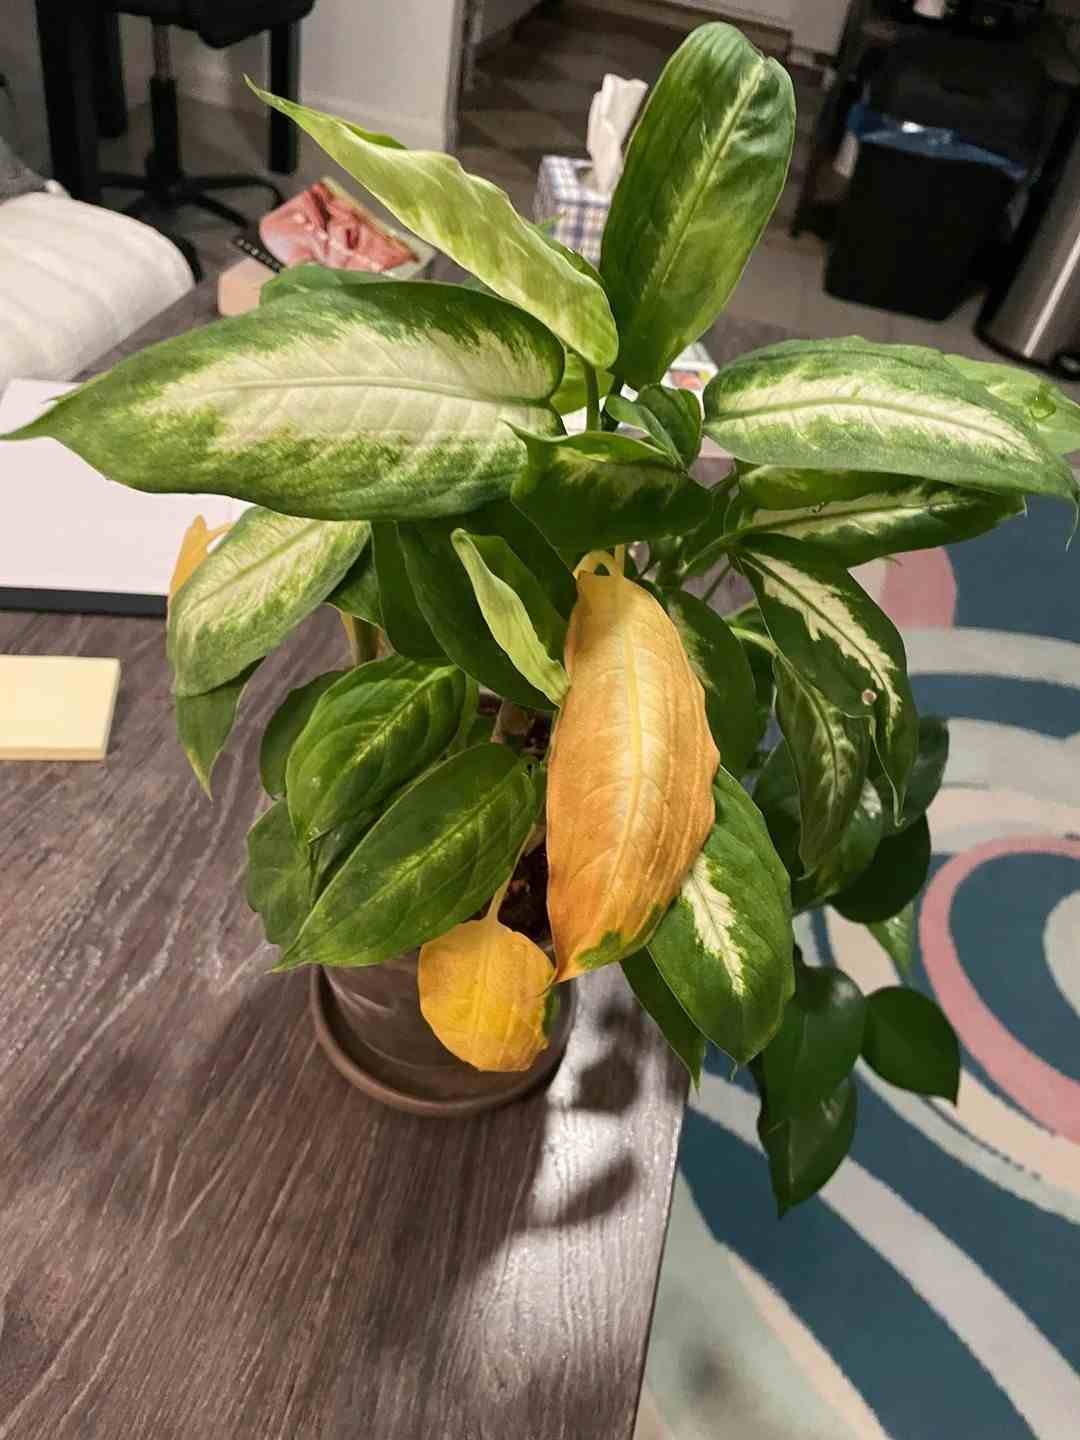
- Lower Leaf Yellowing: Older leaves at the base turn pale yellow and lose their firm turgor pressure.
- Soft or Drooping Foliage: The plant appears wilted despite having damp soil, because dead roots cannot draw up water.
- Brown or Black Splotches: Wet, mushy spots appear near the margins or center of leaves rather than crisp, dry tips.
- Stunted New Growth: Emerging leaves unravel slowly, appear distorted, or emerge with yellow discoloration.
- Stem Softness: The lower cane feels spongy or hollow when gently pressed between your fingers.
If you observe two or more of these symptoms while the soil remains wet, suspect root rot immediately.
Recognizing Odors and Soil Symptoms
Your senses of touch and smell offer dependable clues about the condition beneath the soil surface.
Healthy houseplant soil smells earthy, fresh, and slightly sweet, similar to the forest floor after a light rain.
Soil harboring active root rot gives off a distinctly unpleasant odor.
The smell is often described as sour, swampy, stagnant, or fishy. In addition, soil that stays visibly wet or muddy for more than four to five days after watering strongly suggests that active root absorption has stopped.
Inspecting the Root System Directly
The only definitive way to confirm root rot is by unpotting the plant and examining the root ball firsthand.
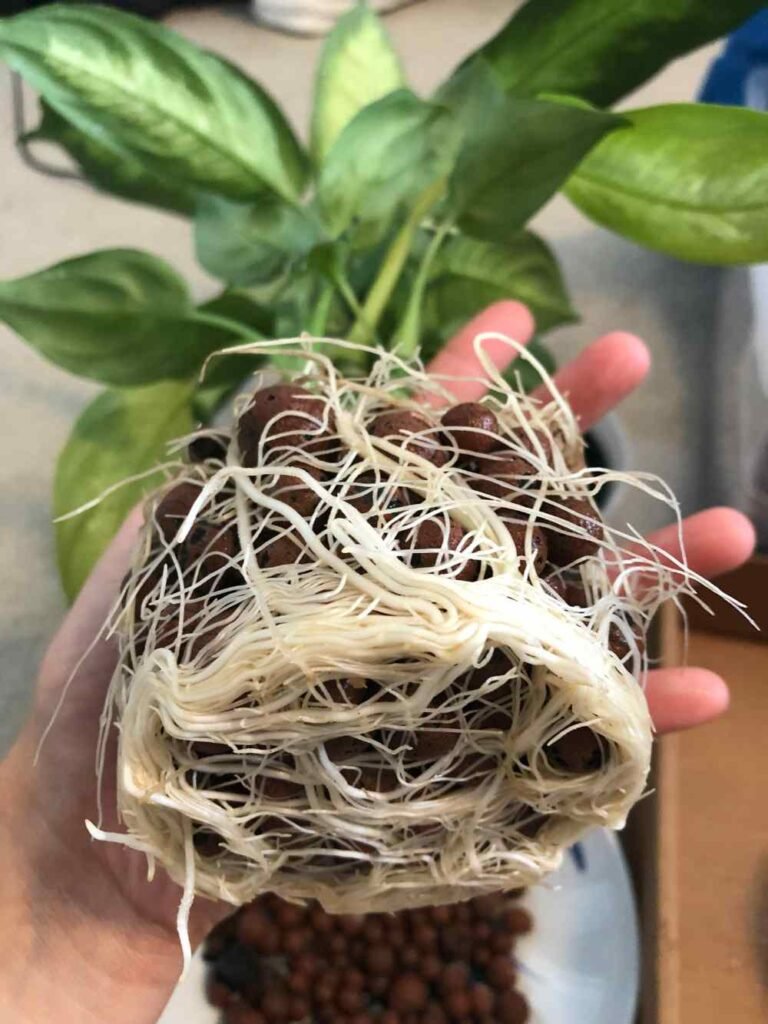
Healthy dieffenbachia roots are firm, flexible, and creamy white or light tan in color.
In contrast, rotted roots are dark brown, black, or reddish-brown.
When touched, decayed roots slip apart easily, leaving behind a thin, stringy inner core. If you slide your fingers along a damaged root and the outer sheath sloughs off effortlessly, rot is present.
Tools You Need for Plant Surgery
Before you begin rescuing your plant, assemble the appropriate tools and supplies on a clean workspace.
Having everything prepared minimizes the time your plant spends out of soil, reducing environmental shock.
- Pruning Shears: Sharp bypass pruners or scissors to make clean cuts without crushing healthy tissue.
- Protective Gloves: Heavy gardening gloves or nitrile gloves to shield against irritating sap.
- Disinfectant Solution: Isopropyl alcohol (70%) or diluted bleach to sterilize cutting tools.
- Hydrogen Peroxide (3%): A gentle treatment to eliminate fungal spores and aerate roots.
- Fresh Potting Mix: Clean, sterile, well-draining soil mix that has never been used for other plants.
- Clean Pot: A new container or a thoroughly disinfected original pot with open drainage holes.
- Spray Bottle and Clean Towels: For targeted cleaning and drying during the operation.
Step One Removing the Plant Safely
Begin by loosening the plant gently from its container.
Never pull forcefully on the main stems, as saturated canes are delicate and can easily snap at the base.
Tip the pot horizontally and support the main stalks near the soil line with one gloved hand.
Tap the sides and bottom of the container with your free hand to break the soil seal. Slide the root ball out smoothly onto your protected work area.
Use your fingers to tease away the heavy, soggy soil from the root network. You can also rinse the root ball under lukewarm running water to wash away old substrate, giving you an unobstructed view of the root system.
Step Two Washing and Trimming Decayed Roots
Once the roots are clean and visible, carefully inspect every section of the root system.
Wipe your pruning shears with rubbing alcohol before making your very first cut.
Clip away all mushy, blackened, brown, or foul-smelling root strands.
Make each cut cleanly into healthy, firm, white tissue about half an inch above the rotted section. Disinfect your shears between every few cuts to avoid spreading pathogens into healthy root zones.
Continue trimming until only firm, light-colored roots remain attached to the main base.
Step Three Pruning Damaged Stems and Leaves
After removing compromised root mass, you must balance the top growth with the reduced root system below.
A smaller root system cannot provide enough moisture to support a full canopy of large leaves.
Carefully cut away all yellowing, brown-spotted, or wilting leaves at the point where their leaf sheaths meet the main stem.
If you had to prune away half of the root system, trim back approximately thirty to forty percent of the foliage. Prioritize removing older, lower leaves so the plant can allocate its remaining energy toward root regeneration.
Step Four Disinfecting Roots and Planter
Treating the remaining root system with a mild disinfectant helps destroy lingering microscopic fungal spores.
Prepare a solution using three parts water and one part standard three percent household hydrogen peroxide.
Submerge the trimmed roots in this solution for three to five minutes, or spray the mixture generously across the entire root mass.
The solution will fizz gently as it releases oxygen and neutralizes pathogens on contact.
If you plan to reuse the original pot, scrub it thoroughly using hot water and soap, then wipe it down with a ten percent bleach solution or rubbing alcohol. Let the pot dry completely before introducing the plant.
Step Five Repotting in Fresh Soil
Fill the bottom third of the disinfected pot with fresh, well-aerated potting mix.
Position your dieffenbachia upright in the center, spreading out the remaining healthy roots gently across the soil surface.
Add fresh soil around the sides of the root ball, filling the pot until the root crown sits at the same depth as before.
Lightly tap the sides of the pot to settle the mix without packing it down aggressively. Water the soil lightly to settle it around the roots, ensuring all excess liquid drains completely out of the bottom holes.
Creating the Best Recovery Environment
Your dieffenbachia will experience some transplant shock while it rebuilds its root system.
Place the pot in a warm room that maintains temperatures between 68 and 78 degrees Fahrenheit.
Provide bright, indirect sunlight through a sheer curtain or set the plant a few feet back from an east- or south-facing window.
Avoid direct sun exposure, which can scorch fragile leaves and increase moisture stress. Keep ambient humidity moderate to high (around 50 to 60 percent), but do not mist the foliage directly while it recovers. Hold off on all chemical fertilizers for at least four to six weeks, as fertilizing can burn tender new roots.
Long Term Habits to Prevent Rot
Preventing root rot in the future comes down to establishing consistent, observant watering habits.
Never water your dieffenbachia on a rigid calendar schedule. Instead, test the soil moisture before every watering.
Insert your finger two inches into the topsoil, or use a reliable moisture meter.
Only water when the top one to two inches of soil feel dry to the touch. Always discard any drainage water that collects in the saucer after fifteen minutes so the pot does not sit in standing water. During winter dormancy, reduce your watering frequency significantly to match the slower growth rate.
Propagating When Roots Cannot Be Saved
If you inspect your dieffenbachia and find that all roots and the lower crown have rotted completely, you can still save the plant through stem cuttings.
Dieffenbachia canes possess exceptional regenerative capacity along their growth nodes.
Using clean, sterile pruners, cut a healthy section of the upper cane several inches above any soft, discolored tissue.
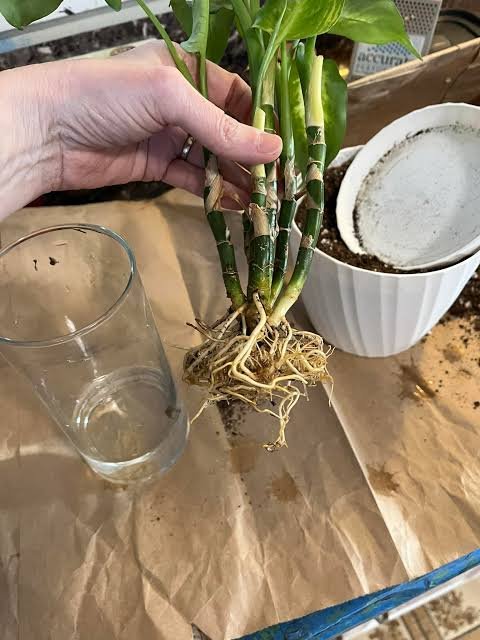
Allow the cut end of the stem to callus over in a dry, shaded room for twelve to twenty-four hours. Once callused, place the cutting into a glass of clean water or moist perlite.
Place the cutting in bright indirect light and change the water weekly. New roots will typically emerge from the nodes within three to four weeks, allowing you to pot up a fresh, healthy plant.
Summary of Key Care Takeaways
Root rot does not have to spell the end for your dieffenbachia.
By staying alert to early symptoms like yellowing lower leaves, foul odors, and soggy substrate, you can intervene before irreversible damage occurs.
Use well-draining soil mixes, pots with active drainage holes, and cautious watering practices to keep your dumb cane flourishing for years to come.
How Bad Is Your Dieffenbachia Root Rot Risk?
Answer 4 quick questions to see your result