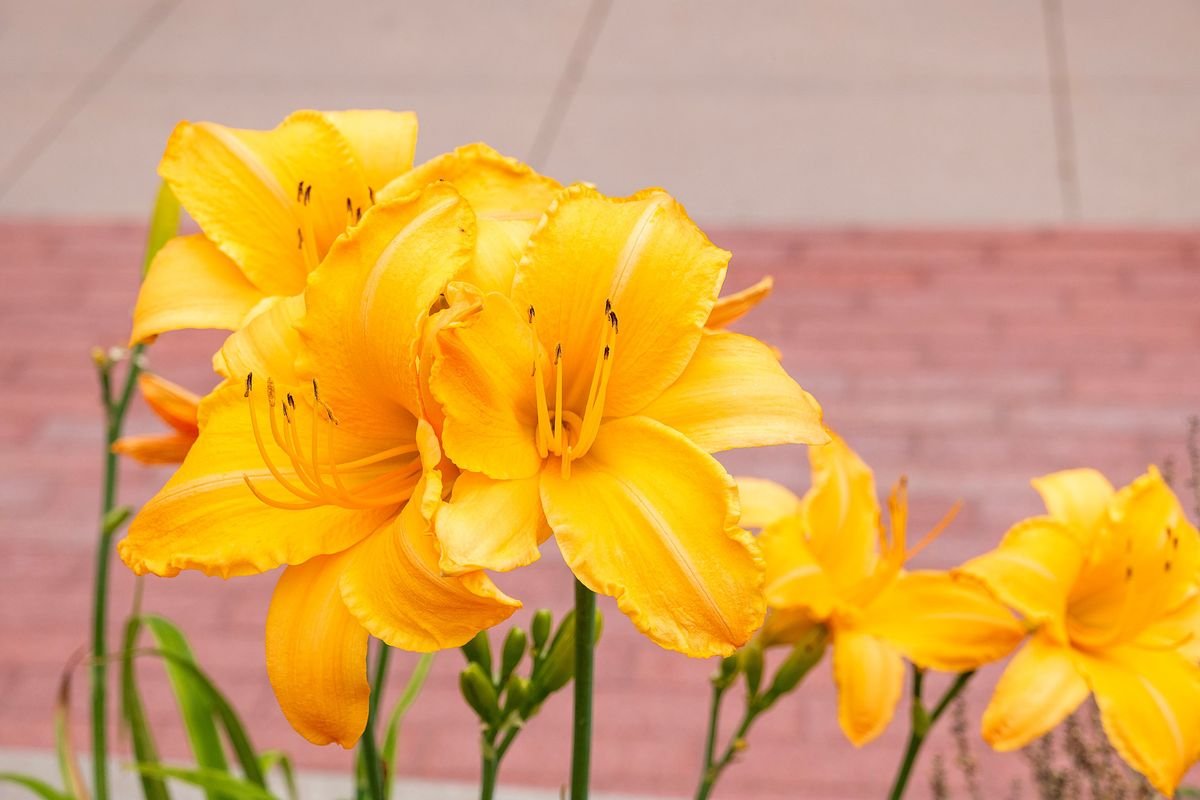
Daylilies are among the most dependable and rewarding flowering perennials you can add to your landscape. Their vibrant colors, graceful foliage, and hardy nature make them a favorite choice for beginner gardeners and experienced horticulturists alike.
If you are planning your garden or wondering why your current plants seem to finish flowering so fast, you might ask yourself how long daylilies actually bloom. While the life of an individual flower is very brief, the overall flowering display of a healthy plant can brighten your yard for weeks or even months at a time.
The Truth About Daylily Lifespans
The botanical name for the daylily is Hemerocallis, which comes from two Greek words meaning ‘beauty’ and ‘day.’ This name tells you everything you need to know about the individual flower. Each blossom opens in the morning, shines brightly for the day, and then withers by nightfall.
Seeing a blossom fade after just twenty-four hours can feel disappointing if you are new to growing these plants. However, you should not let that quick turnaround discourage you from planting them.
Even though an individual flower lasts for a single day, an established daylily plant is designed to produce a steady succession of fresh buds. As one blossom fades away, another one right beside it opens the following morning. This continuous cycle creates a lively wave of color that persists throughout the entire blooming season.
Why Individual Flowers Last One Day
The fleeting nature of a daylily blossom is a natural biological adaptation. In the wild, daylilies rely on daylight pollinators like bees, butterflies, and hummingbirds. The flower opens at dawn to offer fresh nectar and pollen when these creatures are most active.
Once pollination occurs, or once darkness falls, the flower has completed its primary task. It closes up and begins directing its energy toward producing seeds rather than keeping the petals hydrated and pristine.
There are also nocturnal daylily varieties that flip this schedule. These cultivars open their petals late in the afternoon or early evening and stay open throughout the night, attracting night-flying moths. By the following afternoon, their cycle comes to an end just like their daytime cousins.
The Full Daylily Blooming Season
While a single flower lasts only twenty-four hours, the overall flowering window for an individual daylily clump typically lasts between three and six weeks. During this window, mature flower stalks continuously push out fresh buds.
Under ideal environmental conditions, a landscape with multiple varieties can enjoy daylily blossoms from late spring straight through the first frosts of autumn. Some warm regions with mild winters even see certain cultivars flower for seven or eight months of the year.
The secret to enjoying continuous color lies in understanding how different cultivars behave. By mixing varieties with staggered bloom times, you can easily ensure that your garden always has fresh flowers opening every morning.
Early Midseason and Late Blooming Cultivars
Cultivar selection plays the largest role in determining when and how long your daylilies will display color. Daylilies are generally grouped into several distinct blooming categories based on when they set their main flush of buds.
- Early Season Cultivars: These plants start showing flowers in late spring or very early summer, often beginning in May or early June.
- Midseason Cultivars: These varieties produce their heaviest flush during the peak of summer, usually throughout July.
- Late Season Cultivars: These bloom in August and September, providing rich color when many other summer perennials have begun to fade.
- Very Late Season Cultivars: These durable plants continue opening fresh buds well into autumn, often right up until hard frost arrives.
If you plant only one midseason variety, your entire bed will burst into bloom all at once and wrap up in about a month. If you intentionally combine early, midseason, and late varieties in the same border, you can enjoy non-stop daylily color for three to four months straight.
Reblooming and Everblooming Types
Plant breeders have developed specialized daylily varieties that do not stop after their initial summer display. These are known as reblooming or everblooming daylilies, and they are fantastic additions to any home garden.
Reblooming cultivars produce an initial heavy flush of blooms in early summer, take a brief resting period of a few weeks to build up nutrients, and then send up a second flush of flower stalks in late summer or early fall.
Everblooming varieties, such as the famous yellow ‘Stella de Oro’ or the soft peach ‘Happy Returns,’ produce new flower stalks continuously from late spring until cold weather halts plant growth. With basic care and routine maintenance, these cultivars provide months of continuous blossoms.
How Flower Scapes Keep Producing Buds
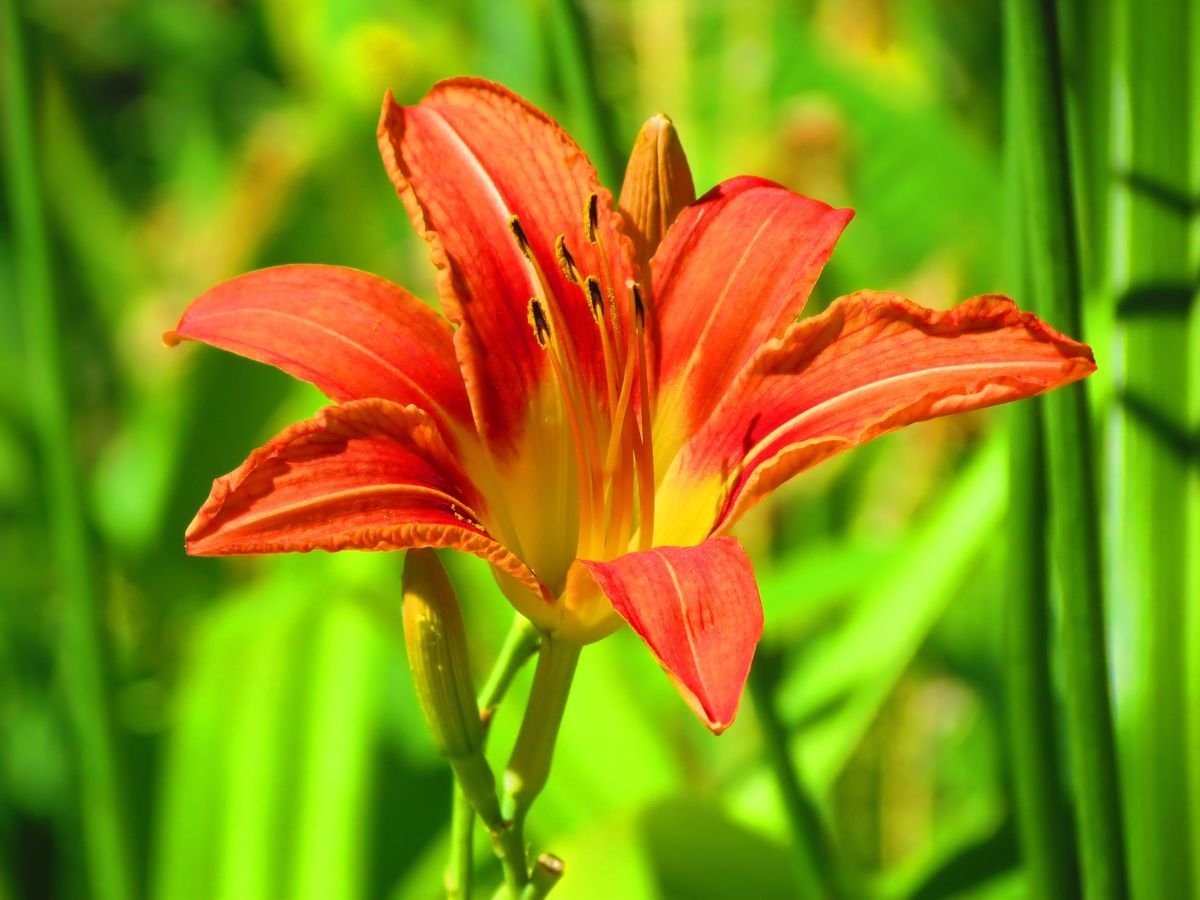
To understand how daylilies keep flowering for weeks, it helps to examine the structure of the plant. Daylily flowers do not grow on standard leafy branches. Instead, they develop on specialized, leafless flower stalks called scapes.
A single scape rises directly from the crown of the plant and branches near the top into several smaller stems. Each branch contains multiple flower buds grouped together in clusters.
A robust scape on an established plant can hold anywhere from ten to thirty individual buds. Because these buds mature at slightly different rates, only one or two will open on any given day. As a result, a single scape can produce fresh blossoms daily for two to three consecutive weeks.
A mature clump of daylilies often sends up ten, twenty, or more scapes at the same time. This multiplication of scapes and buds is what creates the impressive, continuous flower show that gardeners love.
How to Deadhead Daylilies Correctly
Deadheading is the simple gardening practice of removing old, spent flowers from the plant. This is one of the most effective ways to keep your daylilies looking tidy while encouraging them to produce as many flowers as possible.
When a daylily bloom wilts, it shrivels into a wet, brown mass that clings to the scape. If left alone, this spent blossom will slowly dry out, and the plant will begin directing valuable sugars and energy toward seed development.
To deadhead your plants properly, follow these simple steps:
- Inspect your daylily clumps in the morning or late afternoon to spot any wilted, closed flowers from previous days.
- Grasp the withered flower at its base, right where it attaches to the small stem of the scape.
- Gently snap or twist the spent flower off. It should break cleanly away from the stem without tearing the plant tissue.
- If the bloom resists snapping, use a clean pair of pruning snips to snip the blossom off cleanly.
- Take care not to knock off or damage the plump, green buds growing directly next to the spent flower.
Deadheading takes only a couple of minutes each week, but it drastically improves the appearance of your flower beds and prevents your plants from wasting energy.
Dealing with Seed Pods
As you deadhead your daylilies, you will occasionally notice swollen green pods forming at the spots where earlier blooms dropped off. These are seed pods, and managing them is key to a long flowering season.
Producing seeds requires a massive amount of metabolic energy. When a daylily is allowed to mature multiple seed pods, it signals to the root system that its reproductive mission is complete. The plant will then slow down or completely stop the production of new flower stalks.
Unless you are deliberately trying to harvest hybrid seeds to grow experimental seedlings, you should remove these seed pods as soon as you see them. Snip the green pod off right at its base where it joins the scape.
Once an entire scape has finished opening all of its buds and only bare stems remain, you should cut the entire scape down near the base of the plant foliage. This keeps the clump looking neat and channels all remaining energy back into the root crown for future growth.
Watering for Maximum Flower Production
Daylilies are widely celebrated for being drought tolerant once established, but there is a major difference between merely surviving dry weather and blooming abundantly. Water stress is one of the most common reasons daylilies stop flowering early.
During dry spells, a thirsty daylily will abort developing flower buds. The tiny buds turn yellow and drop off the scape long before they have a chance to open.
To keep your daylilies producing large, vibrant blossoms throughout their season, aim to provide them with approximately one inch of water per week. If natural rainfall is lacking, give the plants a deep soaking once or twice a week rather than light daily sprinklings.
Always apply water directly to the soil around the base of the clump rather than wetting the foliage and open flowers. Wet petals can develop unsightly water spots, and damp foliage invites fungal problems like leaf streak.
Soil Quality and Fertilizing Strategies
Daylilies are adaptable and can tolerate a wide variety of soil types, from heavy clay to loose sand. However, they perform best when grown in fertile, well-draining soil that is rich in organic matter.
Amending your garden beds with rich compost or well-rotted manure before planting provides a steady supply of micronutrients and improves moisture retention around the roots.
When it comes to supplemental fertilizer, moderation is essential. Applying too much nitrogen will cause your daylilies to produce an explosion of lush, dark green foliage at the expense of flower scapes.
Apply a balanced, slow-release granular fertilizer with an equal ratio like 10-10-10 in early spring just as fresh green shoots emerge from the soil. For reblooming varieties, a second light feeding right after the first major flowering flush will provide the fuel needed to generate late-season scapes.
Sunlight Requirements for Abundant Flowers
Sunlight is the primary engine that powers daylily blooms. Without sufficient light exposure, daylily scapes become weak, floppy, and hold significantly fewer flower buds.
Most daylily cultivars need at least six hours of direct sunlight each day to bloom at their full potential. Full sun exposure produces the highest bud counts and the strongest flower stems.
There is, however, an interesting exception for cultivars with deeply saturated colors. Dark red, deep purple, and rich burgundy daylilies can absorb intense heat during scorching summer afternoons, which can cause their petals to scald or fade.
If you are growing dark-toned daylilies in hot southern climates, planting them where they receive morning sun and gentle afternoon shade will protect the intensity of their colors without reducing bloom count.
Dividing Clumps for Better Blooms
Even with perfect watering, feeding, and sunlight, you might notice that a previously vigorous patch of daylilies is producing fewer flowers after several years in the garden. This is a classic sign of root overcrowding.
As daylily crowns expand underground, the root system becomes congested. The individual fans of foliage begin competing with one another for space, moisture, and soil nutrients. Over time, bud production declines and flowers become smaller.
To restore your plants to peak performance, divide the clumps every three to five years. The best time to divide daylilies is in late summer or early fall after blooming finishes, or in very early spring before new growth gets underway.
Dig up the entire root clump using a garden spade, shake off excess soil, and gently separate the root mass into smaller sections containing three to five healthy fans each. Replant these divisions with plenty of room to grow, and they will reward you with renewed flowering vigor.
Protecting Blooms from Common Pests and Diseases
While daylilies are remarkably tough perennials, a few common pests and diseases can shorten their flowering season if left unmanaged. Keeping a watchful eye on your beds ensures problems are caught early.
- Aphids and Thrips: These tiny sucking insects feed on developing flower buds. Their feeding causes buds to distort, discolor, or drop before opening. Treat minor infestations with a firm spray of water from a hose or an application of insecticidal soap.
- Daylily Leaf Streak: This fungal disease causes yellowing along the leaf midrib followed by brown necrotic patches. Remove affected leaves promptly and water at the soil level to prevent spores from spreading.
- Daylily Rust: Rust produces raised orange-yellow pustules on the undersides of foliage. Prune back heavily infected leaves and ensure adequate spacing between plants to improve airflow.
- Slugs and Snails: These pests love chewing ragged holes in low-hanging foliage and tender young scapes. Use organic slug bait or coarse mulch barriers around the plant bases to deter them.
Keeping your garden clear of fallen plant debris and maintaining good air circulation around each clump will prevent most of these issues from disrupting your blooming season.
Summary of Best Practices
Enjoying a long and colorful daylily season comes down to a few straightforward gardening habits. While you cannot change the fact that an individual flower lasts only one day, you have complete control over how many total blooms your plants produce.
Start by selecting a smart mix of early, midseason, late, and reblooming cultivars to guarantee continuous staggered color from May through September.
Provide your plants with at least six hours of sun, one inch of water per week, and fertile, well-draining soil. Make a habit of snapping off spent flowers and removing green seed pods so your plants focus all their energy on opening new buds.
Finally, divide crowded clumps every few years to keep the roots energetic and productive. With these simple practices in place, your garden will be filled with brilliant, cheerful daylily blossoms all summer long.
How Well Are You Maximizing Your Daylily Blooms?
Answer 4 quick questions to see your result